Planet Rendering - Part 1 (Diffuse lighting)

Posted by

It's always fun working on graphics. You get such instant gratification that you can see the fruit of your labour right there on the screen. The simulation algorithm is complicated and subtle, but it's not much fun trying to read the output of pages and pages of logs to see the fruits of your labour.

One of the things I wanted for War Worlds is a unique and varied world. Having an infinite universe to explore is not much good if everything looks the same anyway, so one of the things I wanted to do is to have dynamically-generated planet and star graphics. For now, I've just been using place-holders that I created using The GIMP, but this weekend I started on the code that will actually generate the images dynamically.

At it's heart, the code is a very simple ray-tracer. It's simple because we can assume the "scene" is made up of a single object -- the spherical planet, and one light source -- the star it's orbiting. Ray tracing is actually not that hard, it's just a matter of applying a bit of first-year linear algebra. Of course, it's not that easy if you've forgotten all of your first-year linear algebra, but luckily we have the internet to give us a kick-start.

This is going to be posted in multiple parts, due to the size (and the fact that I might get bored and do other stuff before the rendering is complete...)

Diffuse Lighting

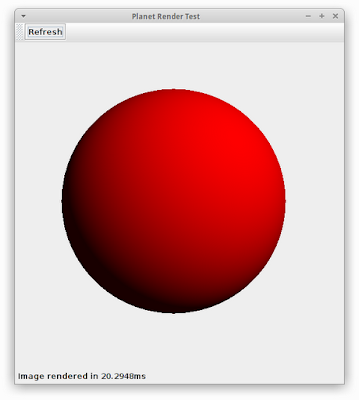
Diffuse lighting

Above you can see the very first of my rendering code. It's just a red sphere with a bit of diffuse lighting applied. Here's an overview of the code I use to render this:

public void render(Image img) {
    for (int y = 0; y < img.getHeight(); y++) {
        for (int x = 0; x < img.getWidth(); x++) {
            double nx = ((double) x / (double) img.getWidth()) - 0.5;
            double ny = ((double) y / (double) img.getHeight()) - 0.5;
            Colour c = getPixelColour(nx, ny);
            img.setPixelColour(x, y, c);
        }
    }
}

So there's a couple of helper classes that I've written, Image, Colour and Vector3 which wrap up a representation of an image, an ARGB colour and a 3D vector respectively. The operations on those classes are pretty standard and not really worth discussing.

You can see this code just loops through each pixel in the image and calls getPixelColour, passing in the (normalized) x,y coordinates of the pixels. Here's getPixelColour as it's used to render the image above:

private Colour getPixelColour(double x, double y) {
    Colour c = new Colour();

    Vector3 ray = new Vector3(x, -y, 1.0).normalized();
    Vector3 intersection = raytrace(ray);

    if (intersection != null) {
        // we intersected with the planet. Now we need to work out the
        // colour at this point on the planet.
        double intensity = lightSphere(intersection);
        c.setAlpha(1.0);
        c.setRed(intensity);
    }
    return c;
}

The "heart" of this function is the "raytrace" method. We take a ray that goes from the "eye" (0,0,0), through the given pixel location and raytrace returns a point on the sphere where that ray intersects (or null if there's no intersection).

If there's an intersection, the lightSphere method is called to work out the light intensity at that point (as I said, currently it just uses diffuse lighting), and then we calculate the pixel colour based on that light intensity.

private Vector3 raytrace(Vector3 direction) {
    // intsection of a sphere and a line
    final double a = Vector3.dot(direction, direction);
    final double b = -2.0 * Vector3.dot(mPlanetOrigin, direction);
    final double c = Vector3.dot(mPlanetOrigin, mPlanetOrigin) -
                     (mPlanetRadius * mPlanetRadius);
    final double d = (b * b) - (4.0 * a * c);

    if (d > 0.0) {
        double sign = (c < -0.00001) ? 1.0 : -1.0;
        double distance = (-b + (sign * Math.sqrt(d))) / (2.0 * a);
        return direction.scaled(distance);
    } else {
        return null;
    }
}

The raytrace, as you can see, is just using the sphere-line-intersection algorithm that we all learnt (and promptly forgot, I'm sure) in first-year mathematics.

private double diffuse(Vector3 normal, Vector3 point) {
    Vector3 directionToLight = Vector3.subtract(mSunOrigin, point);
    directionToLight.normalize();

    return Vector3.dot(normal, directionToLight);
}

private double lightSphere(Vector3 intersection) {
    Vector3 surfaceNormal = Vector3.subtract(intersection, mPlanetOrigin);
    surfaceNormal.normalize();

    double intensity = diffuse(surfaceNormal, intersection);
    return Math.max(mAmbient, Math.min(1.0, intensity));
}

And here's our very simple lighting algorithm. We have an ambient level (set to 0.1 in the example image above), the origin of the "sun" which we assume (quite inaccurately!) to be a point light. In my test image, I put it far enough away that the point nature of the light isn't too big of a deal.

Timing

A quick diversion on timing. In the screenshot above, you can see it took about 20ms to render that sphere. This image is 512x512 pixels, which is much bigger than I expect to ever need on the phone (I'm thinking 256x256 or even 128x128 is the maximum I'll need) but also the phone's CPU is generally going to be much slower than the one on my desktop.

So my plan is that I want to be able to generate a 512x512 pixel planet in under 1 second on my desktop, in order for the performance to be acceptable on a phone. The idea is that rendering of planets will be done on background threads and cached anyway (since the same planet will always have the same image), so I could probably go even more complex if I really want to, but I'm just going to use the above as the initial benchmark to aim for.

Obviously I still have quite a bit of room to move, and the code is not optimized at all, but there's still a lot of features to add!

Series Index

Here are some quick links to the rest of this series:

Planet Rendering - Appendix A (Performance Tuning)

Posted by

I mentioned way back in part one of this series that I wasn't going to be too concerned with performance - as long as I could generate a 512x512 image on my desktop in under a second it "should" be fast enough on the phone.

Well now that I actually have completed images (for the most part), it turns out that some of the images do in fact take about 1 second to generate on my desktop (depending on the components, some take much less -- for example, a "terran" planet with only a bit of perlin noise and a uniform atmosphere only take 250ms). The problem is, that does in fact translate to pretty bad performance on the phone.

The first thing I did on the phone was move rendering of the planets to a low-priority background thread, and then cache the generated images. I also limit the size of the images to exactly the size required for the device (150x150 on a Galaxy S or 200x200 pixels on my higher-pixel-density Galaxy Nexus).

Baseline Timing

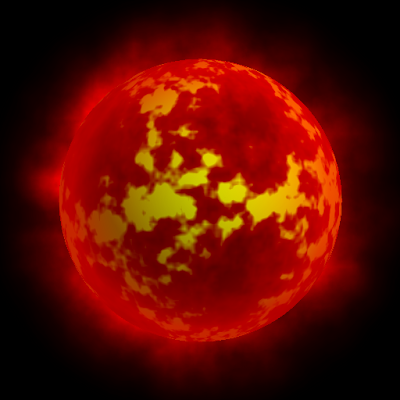
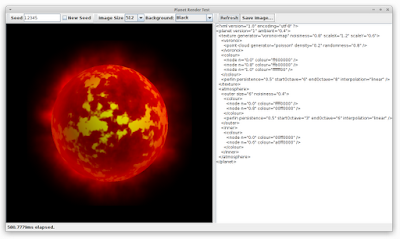
So let's take the following "inferno" planet image as a baseline:

Baseline planet

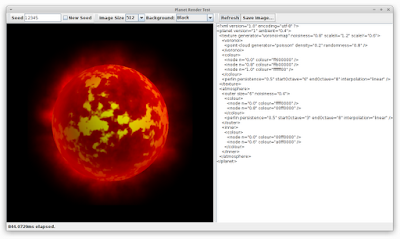
This is an "inferno" planet, and to show you the XML used to generate it as well as the time taken, here it is in my little test application (click for bigger view):

Baseline planet in the UI

This planet makes use of pretty much all of the features that I developed, so it's a good place to look for performance issues. You can see, though, that it takes quite a while to render: 844ms or so (I usually click "Refresh" a few times to make sure initial startup time is not included).

Worse, even though on the phone it's generating a much smaller image, it actually takes longer than that to generate. On my Galaxy Nexus, it's between 2 and 5 seconds. On my Nexus S it's usually between 1.5 and 3 seconds. There's a few possible reasons for that:

  1. It's more sensitive to garbage collection - looking at the output in LogCat, it does at least half a dozen GCs while generating the images,
  2. Dalvik is just that much slower, or perhaps there's certain idioms that are just slowing in Dalvik
  3. Some dumb choices on our own part.

No. 2 is kind of hard to do anything about. One issue is that the JVM on different devices is, well, different, so optimizing for one device may not necessarily yield results (or may even make things worse) on another. No. 1 is pretty universal though, allocating objects (and the resulting garbage collection) can be quite expensive. So we will be going through our code and trying to reduce the number of GCs that we do. Of course, No. 3 is quite likely too :-)

Simple Stuff First

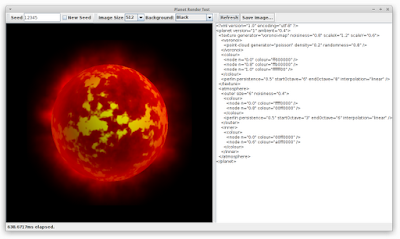
But first, there's some very simple things we can do. The first is if we notice in the XML definition of our planet, atmosphere's template is defined to run from octave 3 to 8. If we simply drop that 8 to 6, we reduce the number of octave to calculate without drastically affecting image quality. You can see this in the screenshot below:

Minor adjustment - big gain

We've dropped a whole 200ms just by adjusting that one parameter! And the image looks almost identical (if you look closely, there some slight differences in the outer atmosphere, but nothing to write home about).

Taking out the trash

So if adjusting one parameter of our Perlin noise function has such a large effect, perhaps we should take a look at what the Perlin Noise function does. Recall from part 4 that our rawNoise function looks like this:

private double rawNoise(int x, int y, int octave) {
    long seed = ((octave * 1000000L) + (x * 1000000000L)
              + (y * 100000000000L)) ^ mRawSeed;
    double r = new Random(seed).nextDouble();

    // we want the value to be between -1 and +1
    return (r * 2.0) - 1.0;
}

You can see here that we're allocating a new Random object every time we call rawNoise. And we call rawNoise a lot. Luckily, the Random class has a member setSeed which we can use instead.

private Random mRawRand; // move this to a member field

private double rawNoise(int x, int y, int octave) {
    long seed = ((octave * 1000000L) + (x * 1000000000L)
              + (y * 100000000000L)) ^ mRawSeed;
    mRawRand.setSeed(seed);
    double r = mRawRand.nextDouble();

    // we want the value to be between -1 and +1
    return (r * 2.0) - 1.0;
}

With that simple change, we're now generating less garbage each loop.

Reducing a bit of garbage

Hmm, OK, so that gives us about 20ms. Not great.

Helper Classes

The helper classes (Vector3, Colour, etc) are generally pretty simple, but they get used a lot. Let's look at our Colour helper class:

public class Colour {
    public int argb;

    public Colour() {
        argb = 0x00000000;
    }
    public Colour(int argb) {
        this.argb = argb;
    }

    . . .
}

So it's basically just a simple wrapper around a 32-bit integer. Every time we call setPixelColour or do some interpolation between colours or whatever, it's generating a new piece of garbage. What if we just make the Colour class a bunch of static methods that work directly on int "argb" values?

Well I tried that, and it turns out it makes no difference whatsoever. This is why you need to test every change, no point making your code less readable if it makes not difference. It's also why you need source code control, even for one-man projects - I can revert that change and try something else! One thing I also want to try was changing the basic "storage" of the Colour from an integer argb value to 4 doubles. Since most of the calculation is done with doubles and it's really only the rendering into the final image that needs to be a 32-bit integer. It might be faster to do all of our calculations without constantly converting to/from a double.

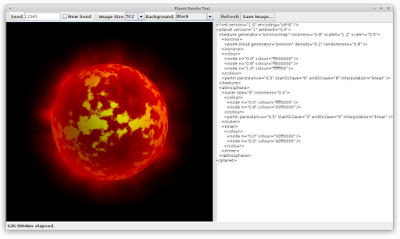
Turns out that makes a bit of a difference, and it actually makes the class simpler and easier to understand. So now we're now down to around 600ms, another 20ms shaved off.

Optimizing the Colour class

Perlin Noise

In my benchmarks, it's actually the PerlinNoise class that takes most of the time. If you look at the definition for our inferno planet, the PerlinNoise class is actually used twice and that's where much of the performance issues come from.

One thing that I've noticed is that while I implemented a "smooth" option, I never actually use it. By taking it out, I get another 20ms or so of performance.

Removing the smoothNoise method

Summary

So all-in-all, we did alright for ourselves, from 844ms down to 580ms, a saving of about 45%. I'm sure with a bit more effort (and perhaps a bit more tuning of the template parameters) we could do even better.

Series Index

Here are some quick links to the rest of this series:
On Android, Garbage Collection can kill you

Posted by

In my last post, I was looking at improving the performance of my planet-rendering code. One of the problems I was having was that while thing ran pretty quickly on my desktop (580ms to render the "inferno" planet, which is one of the more complex ones) I didn't really bother to try running in on an actual device until much later.

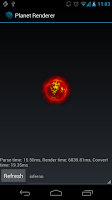
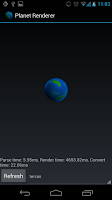
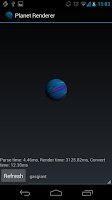
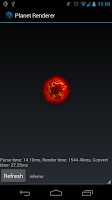
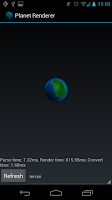
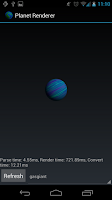
Boy, was that a mistake! To make sure I wasn't doing anything really stupid, I made a quick-n-dirty Android app that just lets me quickly test the planet rendering code. You can see it in action below on a couple of different planet types (click for larger version):

Initial version of an inferno planet Initial version of a terran planet Initial version of a gas giant

Now, keep in mind these are running my Galaxy Nexus -- not a slow device by any stretch of the imagination. But check out the rendering times! While I was able to render these images in a couple of hundred milliseconds on my desktop, they were taking almost two orders of magnitude longer on the device! Over 6 seconds for the "inferno"? Crazy!

Obviously, that's completely unacceptable. What's the problem? It turns out, I rather glibly rejected the reason yesterday when I was doing my initial performance tweaks:

Every time we call setPixelColour or do some interpolation between colours or whatever, it's generating a new piece of garbage. What if we just make the Colour class a bunch of static methods that work directly on int "argb" values?

Well I tried that, and it turns out it makes no difference whatsoever.

Of course, what I failed to realise is that it makes no difference on the desktop JVM. I should've known better and actually tried it on a device first.

Always Measure

The first question: how do I know it's because of garbage collection? Mostly it's because every time I generate an image, LogCat would spew out a bunch of lines like this:

dalvikvm(6316): GC_CONCURRENT freed 431K, 7% free 12898K/13831K, paused 1ms+2ms
dalvikvm(6316): GC_CONCURRENT freed 381K, 7% free 12928K/13831K, paused 1ms+2ms
dalvikvm(6316): GC_CONCURRENT freed 433K, 7% free 12936K/13831K, paused 1ms+3ms
dalvikvm(6316): GC_CONCURRENT freed 121K, 5% free 13211K/13831K, paused 1ms+2ms

It was spewing out around 10-15 of these per image. That's 10-15 times the garbage collector would run to generate one image. The next thing I tried was running the app under ddms, which has some pretty neat heap-tracking features. I could look at all the objects allocated and see where the real problems were.

At the end of the day, though, I guess I didn't know unless I tried. I had some time today, so I decided have a go at reducing the garbage I made, and see what kind of difference it makes.

A quick look at the output from ddms shows I was allocating tens of thousands of Colour, Vector2 and Vector3 objects per image. If I could reduce the number of allocations, I reckon the garbage collections would drop and performance would greatly improve.

Avoid creating unnecessary objects

The most simple change was made to some of my interfaces that were unnecessarily creating objects. For example, I changed this:

public Vector3 normalized() {
    double s = 1.0 / length();
    return new Vector3(x * s, y * s, z * s);
}

To this:

public void normalize() {
    double s = 1.0 / length();
    scale(s);
}

This doesn't allocate a new Vector3 object, I just need to be careful where I don't want the original object to be modified to create a copy first (doing that means I can more easily manage the lifetime of that copy, though).

Another one that you see come up quite a bit is this kind of pattern:

List<Vector3> points = // some list of Vector3 objects

for (Vector3 v : points) {
     // do stuff
}

This causes an allocation of an ArrayListIterator object every time you execute that loop. If you're looping multiple times per pixel in your image, then that's quite a bit of garbage. The solution is to use a "traditional" loop:

List<Vector3> points = // some list of Vector3 objects

int numPoints = points.size();
for (int i = 0; i < numPoints; i++) {
     Vector3 v = points.get(i);
     // do stuff
}

Another place I was allocating unnecessary objects was in my Vector2.hashCode() implementation, which looked like this:

@Override
public int hashCode() {
    return new Double(x).hashCode() ^ new Double(y).hashCode();
}

This one took a bit of thought, but I eventually figured out the solution by looking at the Android source code for Double.hashCode() and just implementing it directly:

@Override
public int hashCode() {
    long lx = Double.doubleToRawLongBits(x);
    long ly = Double.doubleToRawLongBits(y);
    return (int) (lx ^ ly);
}

Object Pooling - not just for database connections

The canonical example of when to use object pooling is database connections. Expensive to create, easy to re-use. Most advice you'll find on object pooling will specifically tell you that it's not worth it for small objects that are used only for a short time - the garbage collector is designed for that sort of usage anyway.

But in memory-constrained devices like Android, where garbage collections are much more frequent (desktop JVMs are much less memory-constrained and can let garbage build up until a lot more - interfering with the running of your program less) avoiding any kind of allocation at all is important.

So here's the (very simple) ObjectPool class that I came up with:

public class ObjectPool<T extends ObjectPool.Pooled> {
    private PooledCreator mCreator;
    private Pooled[] mObjects;
    private int mFreeIndex;

    public ObjectPool(int poolSize, PooledCreator creator) {
        mCreator = creator;
        mObjects = new Pooled[poolSize];
        mFreeIndex = -1;
    }

    public T borrow() {
        if (mFreeIndex < 0) {
            return (T) mCreator.create();
        }

        return (T) mObjects[mFreeIndex--];
    }

    public void release(Pooled obj) {
        if (obj == null) {
            return;
        }

        if (mFreeIndex >= mObjects.length - 1) {
            return;
        }

        mObjects[++mFreeIndex] = obj;
    }

    public interface Pooled {
    }

    public interface PooledCreator {
        Pooled create();
    }
}

We allocate a fixed-size array at startup, then, when you request a new object, it'll check if one is available from the "pool" and if not it'll just allocate a new one. When you "release" an object, it'll go back on the free pool (unless there's no room left in the pool).

The nice thing about this is that it simply falls back to letting the garbage collector handle the object if you forget to release it, or you fill up the pool.

The class is not thread-safe, but I plan to generate all planet images on a single worker thread anyway. Adding thread-safety is not a huge task, but we're going for performance here after all.

Adding this to my Vector2, Vector3 and Colour classes is easy:

public class Vector3 implements ObjectPool.Pooled {
    public static ObjectPool<Vector3> pool =
        new ObjectPool<Vector3>(250, new Vector3Creator());

    public double x;
    public double y;
    public double z;

    private Vector3() {
    }

    . . .
}

Vector3 v = Vector3.pool.borrow();
// do stuff...
Vector3.pool.release(v);

The number of changes throughout my code was actually not all that much. The main difficulty came from ensuring that every time I got an object out of the pool, I made sure I returned it (as I mentioned, not doing so doesn't actually cause a problem, you just defeat the purpose of pooling). The other thing that caused me a bit of trouble was making sure I didn't release an object to the pool more than once (because that would cause all sorts of problems when it came time to remove it and you found it was affecting random other instances of the class somewhere else!)

The ddms tool came in handy here, because I could look at every place an object was allocated but not freed.

The Results

And the verdict? I think the results speak for themselves:

Faster inferno Faster terran Faster gas giant

The performance now is actually comparable to the performance I was getting on the desktop! A 4½ times speed-up!

It's still not perfect. There are a few more places I could reduce the generated garbage, but this was very big bang for very little buck, so I'm quite happy with the overall result.

Simulation testing

Posted by

The heart of any game is the simulation logic. That is, the rules which govern how high you can jump, how many shots it takes to kill you or how much Vespene gas you can mine per second. And of course, War Worlds is going to be no different. I've been building out the simulation logic over the last few weeks, and I think it's starting to get to the point where it's actually quite playable.

The trick with getting the simulation right is the balance between a few different ideas:

  • The rules should be simple enough that a new player can get an intuitive feel for what they are without having someone actually explain it to them, without having to read pages and pages of boring statistics and without having to have a degree in advanced mathematics (for example, things like "increase mining focus to produce more minerals" is a pretty obvious rule).
  • The rules should be complex enough that a advanced player can spend time tweaking the input parameters and make a big enough different to the production capacity of their colony that it actually makes sense spending time doing it. They should also be complex enough that while you can get an intuitive feel for them quickly, really understanding them takes effort.
  • The game's backend is an App Engine app, so we can't rely on there being some server process running 24/7 (technically, you can do a "backend" in App Engine that runs pretty much 24/7, but we're not made of money here...)
  • Above all else, the game needs to be fun.

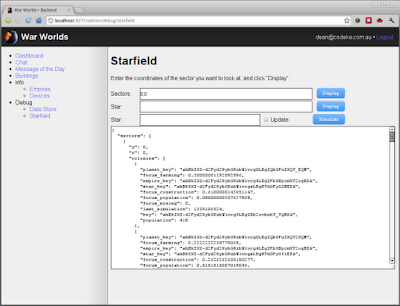
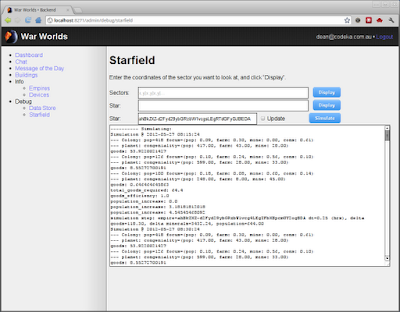
Before I got into the rules I'm working on, I just wanted to make a quick side-track and show the "backend" web site that I use to tweak parameters, a debug the game itself. The War Worlds backend lets me do things like adjust the "Message of Day" (which is what you see when you first log in to the game, I can put status updates there, messages that I need players to read and so on). It also has a "debugging" section where I can go in and query the current state of the universe. You can see an example of that here:

Sector debugging

On this screen, I put in the coordinates of a sector I'm interested in (remember, "0,0" is the "centre" of the universe). In each sector is a number of stars. If any stars are colonised, a summary of the colony is returned as well. The output you see here is basically the same data that is sent to the photo (the difference is that the client-server protocol the phone uses is based on Protocol Buffers, whereas this is just JSON, see my previous post for details of how this works).

On the output here, there's a colony. The various XXX_key properties denote keys used to identify things like the empire who owns the colony, the star the colony belongs to and so on.

Simulation

Simulation in War Worlds happens at the "star" level. Each star is simulated independently of all others, and this allows us to keep a faily simple request-response style of interface. Basically, all the details about a star and the last time the simulation was run for that star are stored in the data store. Then, when you request details about the star, the simulation is run just for that star to bring it up to date.

When you make changes to a colony (for example, when you request a new building to be built, or you adjust the colony's focus) the star needs to be simulated up to the point where you make the change, then stored back in the data store with the new parameters (so that subsequent simulations will use the new parameters from that point on).

Simulation

This view shows the debugging output from the simulation of a star. The simulation runs in two main steps, a "production" step and a "consumption" step. The simulation is conceptually turn-based, which each turn running for 15 minutes. To make the game appear to be real-time, though, we might only run part of a 15-minute turn for the last turn.

Production Stage

In the production step, we look at each colony's farming and mining focus as well as the planet's farming and mining congeniality, combine these two to work out how much goods and minerals are produced in that turn. In the screenshot above, you can see the first colony (which has a farming focus of 30% - quite high) produces 53.9 goods that turn.

The actual calculation is:

goods = population * farming_focus * farming_congeniality/100

You can see the second colony has a much smaller population, and also a lower farming focus and congeniality which is why the goods produced is much lower.

Once each colony has finished the production stage (a similar calculation also runs for mining/minerals), we move onto the "consumption" stage.

Consumption Stage

Technically, we still "produce" things in the consumptions (buildings, population) but we also use up the resources that were generated in the previous stage. Each colony works out it's updated population and also works on building buildings and ships in this stage.

For every 10 "units" of population, 1 "good" is required per hour to sustain it. You can see that reflected in the total_goods_required number: add up the population of the three planets, divide by ten to get 64.4. If there's not enough goods produced, then we'll dip into the star's storage of goods. You can see our colonies this turn generated about 63.1 goods which means we need to dip into the storage for the last little bit. If there's not enough goods stored then it affects our goods_efficiency factor. This is basically a number between 0 and 1 which we use to adjust how much our population increases (or decreases!). Since we have plenty of goods still, our goods_efficiency is 1.

The population increase is calculated as:

population_increase = population * population_focus * (goods_efficiency - 0.75)
if population_increase > 0:
    population_increase *= population / population_congeniality
else:
    population_increase *= 1 - (population / population_congeniality)

Basically, what this means is your population increases in ratio to your population_focus value and also depending on whether you have enough goods to support your current population. Then, a factor is applied depending on how close your population is to the planet's population congeniality. Your population should never go above the planet's population congeniality.

Presenting the numbers

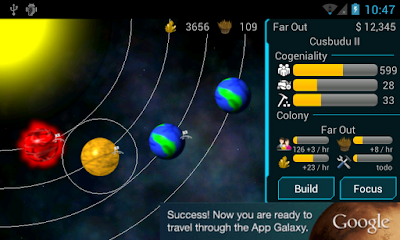
One of the really difficult issues I'm facing is how to present this data in the user interface in a way that's intuitive and doesn't take up loads of space. I don't want my game to be just "spreadsheets in space" or something, so I need to find a succinct way to display all this data. For now, this is what you see:

In-game view

Under the "Colony" heading, you can see the four facets of your colony. The progress bars represent the focus you've configured (you can see this corresponds to the second colony in the screenshot from the backend). So it has a low population focus which is reflected by the fact that it's currently only 126 +3 / hr (meaning it should increase by approximately 3 per hour). Mining focus is quite high, and you can see that corresponds to an equally high rate of around 23 minerals per hour.

Buildings

I've also got logic in place to build buildings, but I'll go through that in another post (it's complicated enough in itself). I haven't figured out the best way to describe construction in the UI yet either, so I'll wait until I've figured something out before writing about it.

Conclusion

I'm still not convinced I've got the balance quite right yet. For example, I'm considering adding a popup with more detail for when you tap on the four focus areas (or maying making the "focus" window more useful in general). I'm also not enough sure the exact equations I've displayed above are exactly as they'll appear in the final game. I guess play-testing and time will tell.

Progress Report, May 2012

Posted by

It's been a while since the last progress report. But there's been plenty of stuff happening and you'll notice now that the site is actually hosted on it's own (final?) domain and I've re-written the whole site so that it's now an App Engine app itself. Custom blog and all (really basic for now of course... eventually I'd like to build a forum or something for player to get together and discuss the game as well, but we'll see how that goes).

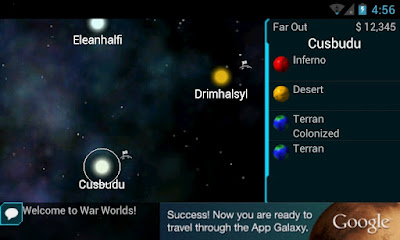
Anyhoo, the first screenshot I've got for today is the starfield view. It's not all that much changed from last time:

Starfield

A couple of points to note here:

  1. I've changed the sizing once more, it's now much more "zoomed in". I'm still not sure it's quite right (I think I went a little too far in that direction and might scale it back again)
  2. The planet list on the left shows all of the planets around the currently-selected star. Soon it will also show all your ships at that star too. There's more detail that should be going here as well, but that's it for now.
  3. Where it says "Welcome to War Worlds" is the chat window. If you tap the button, it brings up the full chat window where you can interact with other players. Chat is actually working in the game, but obviously I've got nobody to chat with yet...
  4. The lower-right image is an AdMob placeholder for an ad. I'm thinking the game will be ad-supported mainly, but I haven't fully worked out the mechanics of monetization yet. Ads are easy, though.

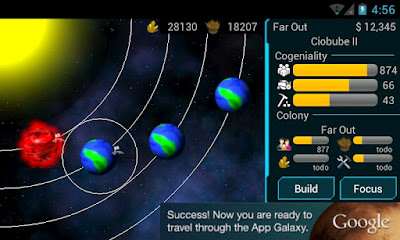
Tap on a planet in the right-hand list and you get taken to the solar system view:

Solar System

Here you can see this star has one "Inferno" planet and four "Terran" planets. I've tweaked the universe-generation algorithm now so that it favours Terran planets more and also to more realisticly place the other kinds of planets (for example, Inferno planets tends to go close to the star, Gas Giants futher away, etc)

Other points to note here:

  1. The chat window is missing, that's an oversight on my part: the bottom section of the screen should always have the chat window and the ad.
  2. The "Congeniality" of the planet has three dimensions that you can see here. Population, Farming and Mining. There describe how "congenial" the planet is to that kind of resource. I've tried to generate values in a way that seems "natural" for example, Terran planets are generally congenial to Population and Farming, while Inferno planets are congenial to Mining and "ill-suited" to Population.
  3. Under the planet's Congeniality meters is details about your colony. There's a couple of "TODOs" there, but basically the progress bars show the relative focus of your colony (i.e. you can focus on growing your population, on farming, mining or construction). In the selected colony, you can see I've got a large focus on population, and equal focus between farming and construction.
  4. In the solar system view itself, you can see the little "flag" icon which shows where you've got a colony. In this case, I've got a colony on the inferno planet and one on the selected Terran planet.
  5. In the top-right of the view, you can see the current amount of minerals and food. You obviously get minerals by mining and food by farming. You need food to support your population and minerals to build things (more on this in a second).

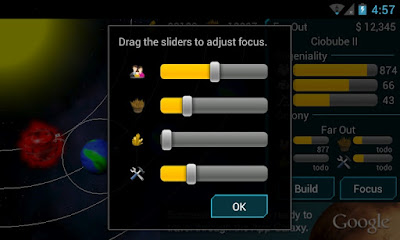
If you tap the "Focus" button, you can adjust the sliders which control your colony's focus:

Focus

It's a little hard to explain, but basically "focus" is a number from 0.0 to 1.0 for each of the four areas. The four areas need to add up to 1.0 and the focus represents the percentage of your population that is "focussed" on the particular area. As you adjust the focus on one area, the other sliders automatically adjust to ensure it all adds up to 1.0.

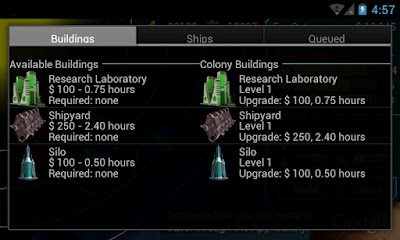
Back on the solar system view, if you tap the "Build" button, you see:

Build Menu

The build menu. The first tab lets you build buildings on your colony, as well as upgrade existing buildings. This is pretty basic for now, but you can see here I've already built a Research Laboratory, Shipyard and Silo. For now, they don't actually do anything, but eventually the buildings will give your colony extra abilities and whatnot (for example, the ability to build ships, store extra food, increase your production, etc).

By the way, the images here are taken from the FreeOrion project. Artwork from the FreeOrion project is licensed with the Creative Commons Attribution-ShareAlike 3.0, so I think it's OK for me to be using them. I'm planning to come up with my own artwork before the game is released anyway, this is just placeholder stuff.

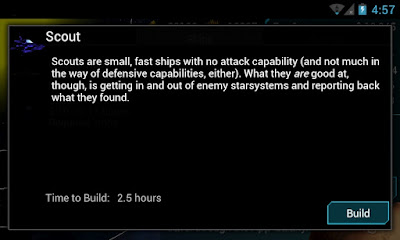
The second tab is the "Ships" tab, which is similar to the Buildings tab, but lets you build ships. When you tap a building or ship, you are presented with this view:

Build Confirm

Here you can see a brief description of what you're going to build, an approximation of how long it will take (each building/ship has an "intrinsic" build time based on the "complexity" of the building, but also your colony's Construction focus and the amount of minerals you have available affect build time as well).

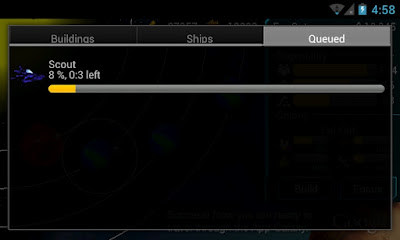
Tap on "Build" and the item gets added to your build queue, which is the third tab of the "Build" window:

Build Queue

Here you can see I have a "Scout" ship queued up, it's 8% complete and will take another 3 minutes to complete.

And that's pretty much the state of the game as of this moment. There's a long way to go yet, but hopefully you can see the beginnings of the game finally taking shape!