In our last post, we finished up rendering the Voronoi map using a colour gradient to get some nice lava-like effects. The problem was that the resulting image was far too uniform to look like "real" lava or fire.
Perlin Noise
Perlin noise is a technique for generating noise that was developed by Ken Perlin while he was working on the film Tron.
Generating perlin noise basically means combining noise at different octaves and smoothing the result. If we take a look at the following picture:
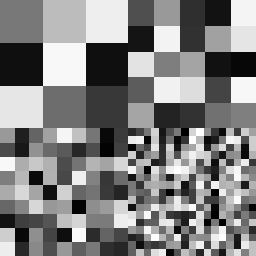
From top-left to bottom right, we see noise in ever-increasing octaves. The first octave just divides the bitmap into 3x3 sections and generates a random value in each section. The second octave divides the bitmap in 5, then we devide the bitmap in 9, then 17. If you look closely, that's actually 2n + 1.
The trick with perlin noise is how we combine these octaves together. But first, lets look at the code to generate the images above. First of all, we need a function that'll generate random values but we want it so that each time you pass in a certain (x, y) value, we want to always get the same random value.
private double rawNoise(int x, int y, int octave) {
    long seed = ((octave * 1000000L) + (x * 1000000000L)
              + (y * 100000000000L)) ^ mRawSeed;
    double r = new Random(seed).nextDouble();

    // we want the value to be between -1 and +1
    return (r * 2.0) - 1.0;
}
This function will, given an (x, y) coordinate and an "octave" value, always return the same value for that (x, y, octave) combination. But we can give it a different mRawSeed value to ensure it returns a different set of values by changing the mRawSeed. For simplicity, we want to return a value between -1 and +1 (it makes the combination of values easier later on).
So to generate the image above, we use something like this:
public double getNoise(double u, double v, int octave) {
    double freq = Math.pow(2, octave) + 1;
    double x = (u * freq);
    double y = (v * freq);

    return rawNoise((int) x, (int) y, octave);
}
This takes values for u and v between 0 and 1, and returns a noise value based on the current octave. Pass in an octave of 1 and you'll get the three big squares. An octave of 8 and you'll get 257x257 squares.
So how to combine the different octaves into something that's nice and smooth? If you just add the values directly, it's not going to look very smooth, because you'll just end up with the highest octave having the largest amount of influence. Instead, the way we do it is each time we increase the octave, we decrease the amplitude of the noise (that is, make it closer to zero). So let's modify our getNoise function so that it combines a bunch of octaves together:
public double getNoise(double u, double v) {
    double total = 0.0;

    for (int octave = 0; octave <= mEndOctave - mStartOctave; octave++) {
        double freq = Math.pow(2, octave + mStartOctave) + 1;
        double amplitude = Math.pow(mPersistence, octave);

        double x = (u * freq);
        double y = (v * freq);

        double n = rawNoise((int) x, (int) y, octave);
        total += n * amplitude;
    }

    return total;
}
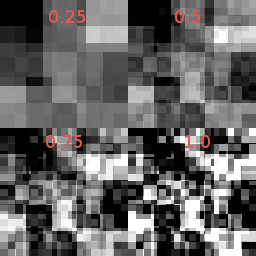
For each octave, we calculate the amplitude to be mPersitenceoctave, where mPersistence is a value we can tune between 0 and 1. A persistence of 1 means that we don't decrease the amplitude of each octave at all. A persistence of 0.5 means we halve the amplitude each octave. Here's some examples of octaves 1...4 with different mPersistence values:
We're starting to get there, but that's still not very smooth. The problem is that we're generating the noise on integer values: we want to interpolate those noise values between the integer values. There's lots of different interpolation algorithms. Linear interpolation is fast, but doesn't give great results:
public double interpolateLinear(double a, double b, double n) {
    return a + n * (b - a);
}
Cosine interpolation is much nicer, though somewhat more complex to calculate:
public double interpolateCosine(double a, double b, double n) {
    double radians = n * Math.PI;
    n = (1 - Math.cos(radians)) * 0.5;

    return interpolateLinear(a, b, n);
}
In reality, since our planets are quite small, linear interpolation might be good enough, and given that it's so much faster, we might not even bother with cosine interpolation. But we'll leave it in for now.
One final step is taking the 1-dimensional interpolation functions above and combining them to interpolate in 2 dimensions:
private double interpolatedNoise(double x, double y, int octave) {
    final int ix = (int) x;
    final double fx = x - (double) ix;

    final int iy = (int) y;
    final double fy = y - (double) iy;

    final double nx1y1 = rawNoise(ix, iy, octave);
    final double nx2y1 = rawNoise(ix + 1, iy, octave);
    final double nx1y2 = rawNoise(ix, iy + 1, octave);
    final double nx2y2 = rawNoise(ix + 1, iy + 1, octave);

    final double ny1 = interpolateCosine(nx1y1, nx2y1, fx);
    final double ny2 = interpolateCosine(nx1y2, nx2y2, fx);

    return interpolateCosine(ny1, ny2, fy);
}
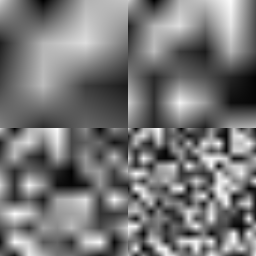
As you can see, we work out the rawNoise at the integer coordinates around the given (x, y) value, then interpolate the horizontal direction, and then in the vertical direction. Replace the call to rawNoise in our getNoise implementation with a call to interpolatedNoise and we can generate images like this:

Texturing Planets
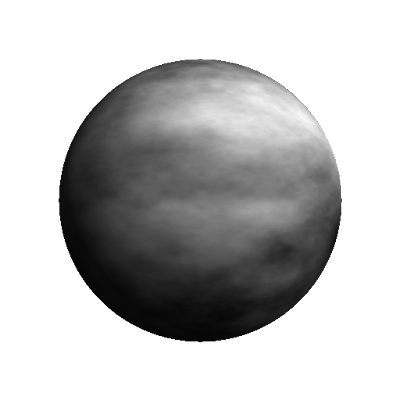
So what's the use of this? Simplest of all would be to render the perlin noise texture directly to a sphere. Just mapping perlin noise directly to the sphere looks unexciting:
But what's say we combine our perlin noise function with the ColourGradient class we came up with last time?
ColourGradient gradient = new ColourGradient();
gradient.addNode(0.0, new Colour(0xff066b8d));
gradient.addNode(0.2, new Colour(0xff06418d));
gradient.addNode(0.5, new Colour(0xff0855b8));
gradient.addNode(0.5001, new Colour(0xff21972c));
gradient.addNode(1.0, new Colour(0xff08550b));
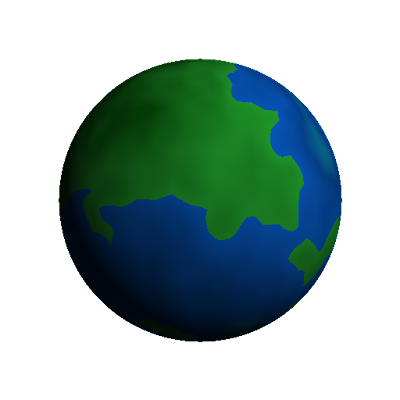
Now we're getting somewhere! That's actually looking pretty earth-like!
Voronoi diagrams + Perlin noise = Awesome!
Remember our Voronoi diagram we left off with last time?
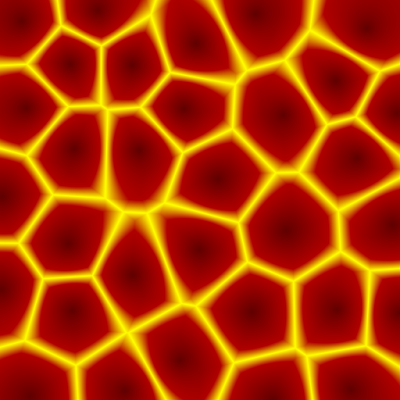
How can we combine this with perlin noise to make more realistic-looking lava? Recall that each pixel in that texture map represents the distance from the centre of the cell to the edge of the cell in the voronoi diagram. What if we scaled the distance by the value of the perlin noise function at that pixel?
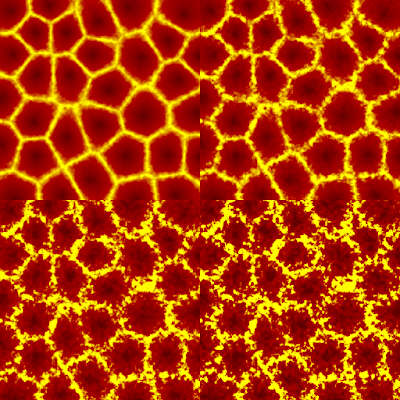
So let's take the getColour method from last time, and modify the normalizedDistance value (which should run from 0..1) by the output of the perlin noise function:
double normalizedDistance = distance / (totalDistance / 2.0);

double noise = perlinNoise.getNoise(u, v);
normalizedDistance += noise * mNoisiness;
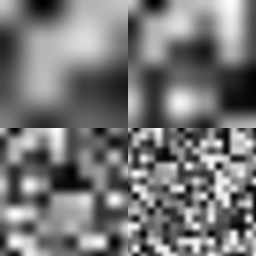
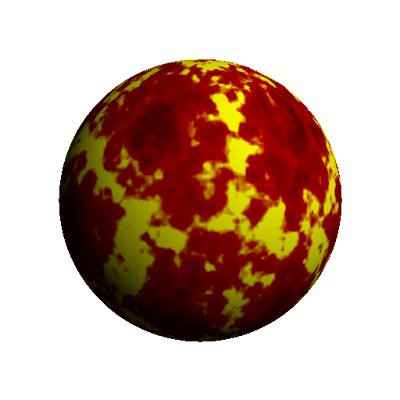
The getNoise value is what we have above that returns a value between -1.0 and +1.0. We then scale that by a "noisiness" factor, which is a parameter we can tune to control how much the output is affected by the noise, and we can generate textures like so (with different values for noisiness):
Mapping this onto our sphere and we're looking pretty good!
Putting it all together
So now we've got all the pieces in place to generate some pretty neat-looking planets. Here's a sample of different kinds of planets we can generate, just by tuning the various parameters what we've come up with so far:
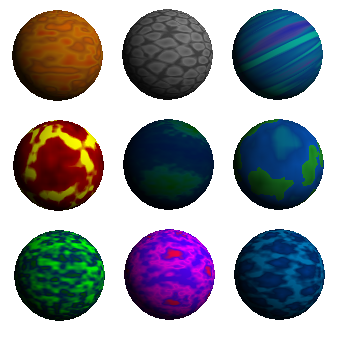
In the game, I expect the basic overall colour of the planets will be how players differentate between then. For example, bright red/yellow is "inferno", purple is "radiated", bright green is "toxic" etc. Having said that, being able to generate unique planets makes the game that much more interesting. Here's what it actually looks like with some of these planets in the game:

Some issues I'm noticing with these planets:
- The light direction on the spheres is all wrong: it should be coming from the sun!
- They still look a bit boring with no atmosphere
- They're all the same size, planets should be all different sizes
Overall, I'd say we're making nice progress though.
Next Time
Next time, we're going to look at how we can parameterize the planet drawing and make it easy to generate all of the different kinds of planets we're looking at. There's also some more tuning of the images to do (to fix up the issues I mention above).
Series Index
Here are some quick links to the rest of this series: